Finding Duplicate Files
There are two main methods to scan for duplicate files using Dirk. The first method is to use the stand-alone File Scanner Utility. The second method is to view duplicate files that are part of a Managed Repository.
This section documents the first method: the stand-alone File Scanner Utility.
For more information about Managed Repositories, please visit that section.
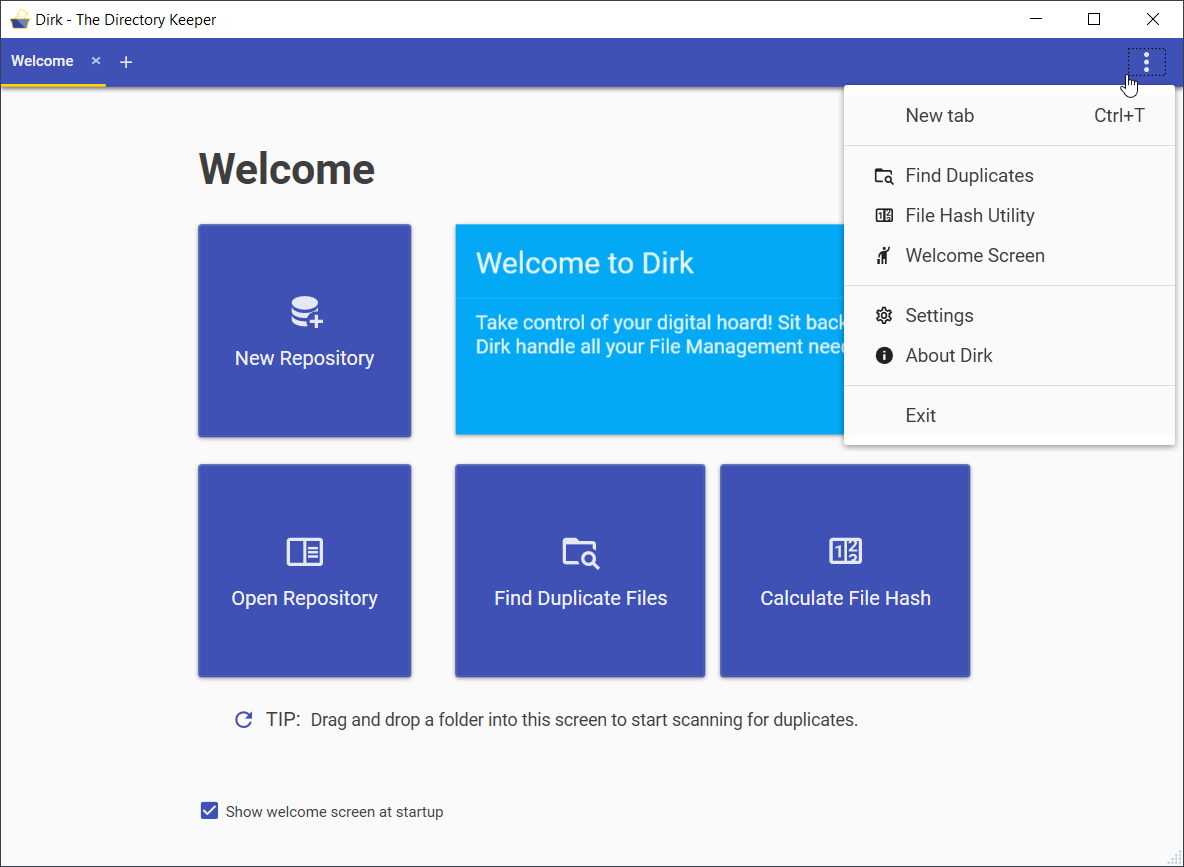
To open the stand-alone File Scanner Utility, simply click the Find Duplicate Files button from the Welcome Screen, or select the Find Duplicates option from the Side Menu:

TIP: If you only want to scan for duplicates inside a single folder, you can simply drag and drop that folder from the File Explorer into the Welcome Screen.
Specifying Folders to Scan
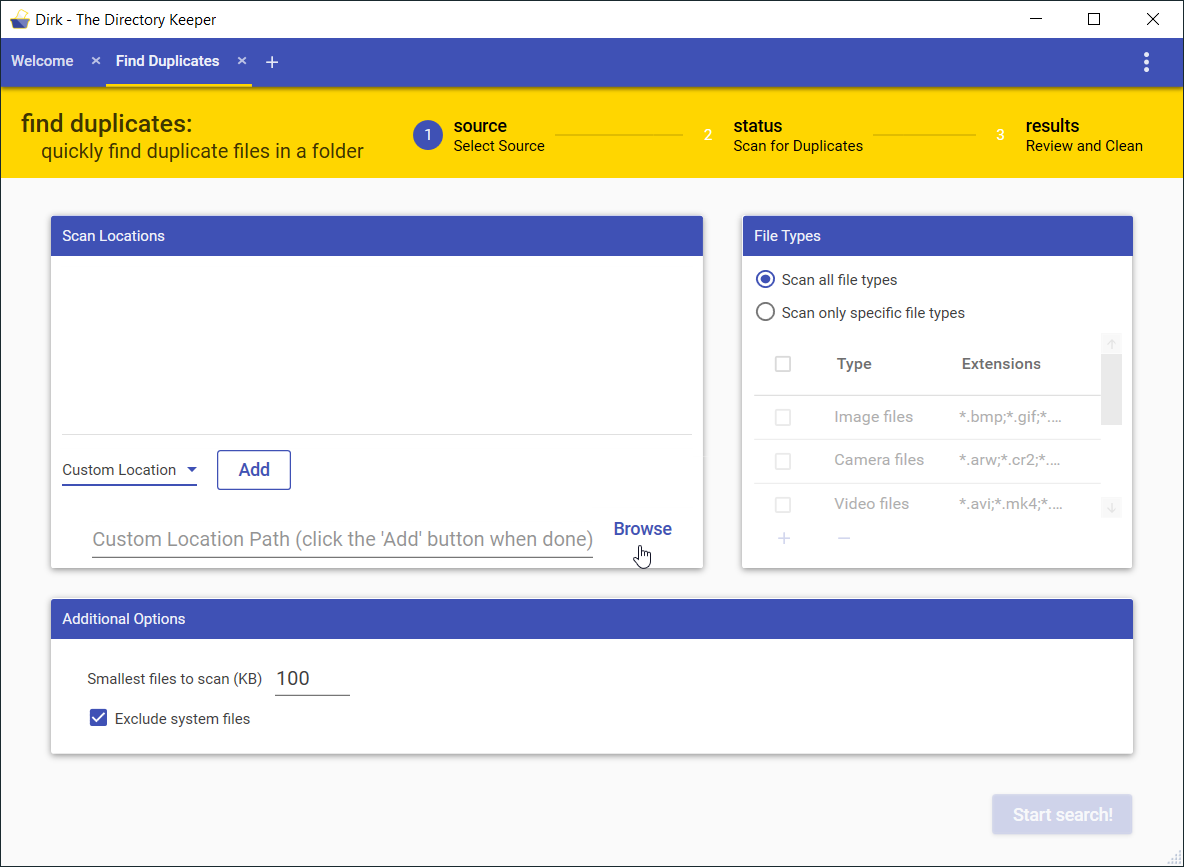
After you open the stand-alone File Scanner Utility, you can provide the locations that you wish to be scanned, and optionally specify the types of files to be scanned:

TIP: You can drag and drop folders from the File Explorer into this screen, and they will be added to the Scan Locations list.
Scan Locations
This section allows you to specify the locations (folders) on your computer that you want to be scanned for duplicate files.
There are a number of common locations available in the drop-down list. Select the item you want from this list and then click the Add button.
If the location you want to scan is not in this list, select the Custom Location option. This will allow you to enter any location that is accessible from your computer. Click the Browse button to browse to a folder that you want to scan.
You can specify multiple locations to scan.
If you entered an incorrect location, simply hover over the item in the list and click the Remove entry (X) button.
File Types
By default, Dirk will scan all the files in the Scan Locations that you specified.
If you want to limit the scanning to a specific subset of files, you can do so by selecting the Scan only specific file types option in the File Types group.
After Scan only specific file types is selected, add a checkmark in the type of files that you want to include for scanning. If none of the pre-allocated types do not match the types of files that you want to scan, click the Add (+) button and you can create your own file type group.
Additional Options
These are additional options that control the File Scanning operation. It is recommended that you do not modify these settings, otherwise the File Scanner might find a very large number of files that will not be relevant to you:
-
Smallest files to scan: This option specifies the smallest file size to scan for duplicates.
-
Exclude system files: When this is enabled, system-related files will not be included in the scan.
When you are finishing configuring the locations that you want scanned, click the **Start search!** button to proceed to the next step.
The File Scanning Operation
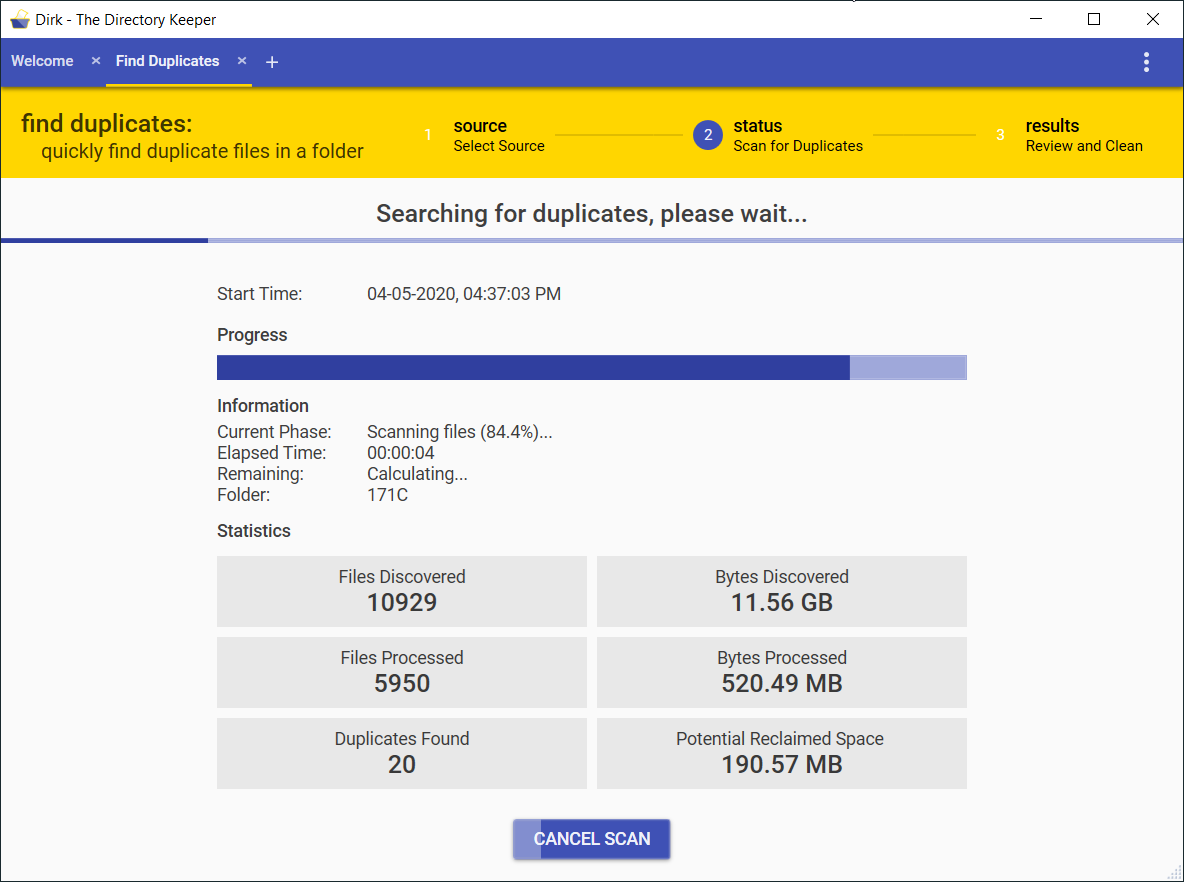
After you have pressed the Start search! button from the Scan Locations screen, the File Scanning operation will begin:

When the File Scanner is actively scanning for duplicate files, you will see a Status screen showing you the overall progress and specific statistics about the scanning operation.
If at any time you wish to cancel this operation, you can click the Cancel Scan button. This will bring you back to the Scan Locations screen.
Viewing Results
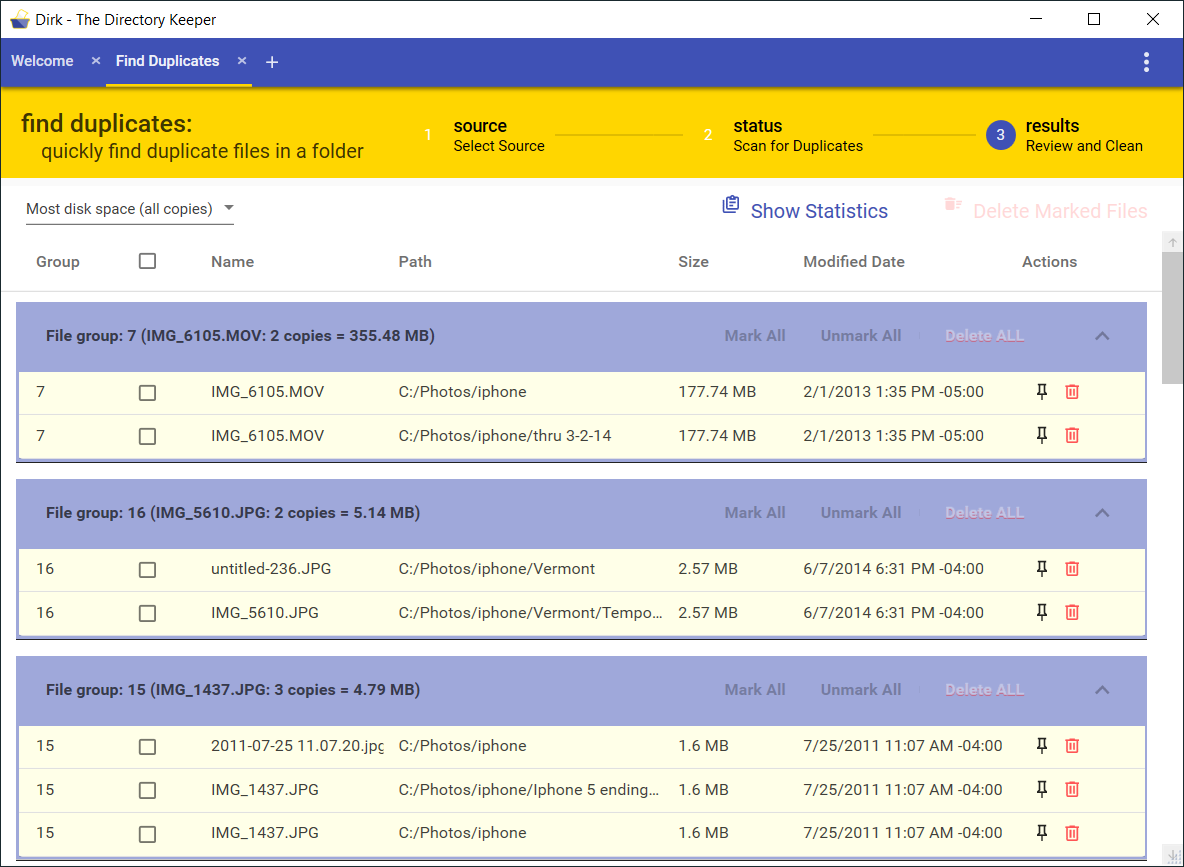
After Dirk has finished scanning, you will be presented with the results of the scan:

Overview
As soon in the screenshot above, all duplicate files that were detected by the File Scanner will be put into File Groups.
Each File Group represents a file that has multiple identical copies. The File Group header contains information about all of the identical files, including the total number of copies and the total amount of disk space consumed.
You can collapse groups so you only see the header information by clicking on the Up Arrow (^) on the right-side of the File Group header. This is helpful if you are not interested in a specific group’s entries.
File Group Sort Order
By default, the groups are sorted so that the ones that take the most disk space are displayed at the top of the list.
You can change this by selecting from the following options located in the dropdown at the top of the screen:
-
Most disk space (all copies): This sorts the File Groups by the total amount of storage a group is consuming, taking into account ALL COPIES of the file.
-
Largest file (single copy): This sorts the File Groups by the largest single file, NOT taking into account its copies.
-
Number of copies: This sorts the File Groups by the largest number of duplicated copies.
-
Most recently modified: This sorts the File Groups by the files that have been most recently modified.
File Sort Order
In addition to sorting the File Groups, you can sort entries (copies) within the File Groups as well.
By default, entries within a File Group are sorted so that the most recently modified copies are displayed at the top of each group.
You can change this by clicking on the Column Headers at the top of the list (eg: Name, Path, Modified Date). You can click on a header multiple times to switch from ascending to descending order.
Actions
Dirk provides many options for managing duplicate files that it has detected.
Global actions
These actions are accessible from buttons at the top of the screen, and are not associated with any specific File or File Group:
-
Show Statistics: This displays general statistics about the File Scanning operation that just occurred.
-
Delete Marked Files: This will delete ALL files that have been marked in the Duplicate Files list. As you are reviewing the Duplicate Files list, you can mark individual file entries by clicking in the entry’s box (you will see a checkmark after doing so). In addition, you can mark entire groups of files (see File Group actions below).
WARNING: Dirk will prompt you before deleting any files. However, delete operations CANNOT be undone if you proceed with the deletion.
File Group actions
These actions are located in the File Group header and apply to ALL copies of the files within that specific group:
-
Mark All: This will cause all files within the group to be marked.
-
Unmark All: This will cause all files within the group to be unmarked.
-
Delete All: This will delete ALL COPIES of the files in the File Group.
WARNING: Dirk will prompt you before deleting any files. However, delete operations CANNOT be undone if you proceed with the deletion.
File actions
These actions are located at the end of each row for an individual file:
-
Delete all other copies in this File Group (“pin” icon): This will delete ALL OTHER copies of the file in the current group. This is useful if you know that you only want a single specific copy of a file and want to quickly delete the rest.
-
Delete this copy (“trash” icon): This will delete this one specific copy of the file.
WARNING: Dirk will prompt you before deleting any files. However, delete operations CANNOT be undone if you proceed with the deletion.

